Showing posts with label birthday gift. Show all posts

Sunday, 23 February 2014

Ripple Baby Blanket

Really close friends of ours are expecting. They have decided to be surprised on the day so we don't know if we are planning for a boy or a girl.
I decided I really wanted to make something that would/could be around for a long time and would suit whatever nursery colours they ended up having.
I have included the pattern I used at the bottom of this post.

I used bamboo cotton so it can be washed often.


I've always liked ripple blankets and thought they were much harder than this, but I would recommend them to anyone!

----------------------------
PATTERN
With white, chain about 1.5 times as wide as you want your blanket to be. Don't worry if it is too long- you can always cut off the excess of your chain once you've started you valleys and peaks and can see how much you like.

I like three single crochet up the side of the hill, 3 crochet into the next single crochet, then three single crochet don the other side of the hill. Then, to make the valley, skip two single crochet and start the three going up the hill again.

At the last "side" of a peak you'll need to skip a single crochet and then turn as normal and skip another as you up the side again- otherwise your piece gradually increases- something I missed the first time I tried this.

Here is the pattern, properly laid out:

Row 1: With white , single crochet (sc) in 2nd chain (ch) from hook, sc in next 2 ch, *3 sc in next ch, sc in next 3 ch, skip (sk) next 2 ch, sc in next 3 ch; repeat from * to last 4 ch, 3 sc in next ch, sc in next 3 ch - 13 ripples.
Row 2: Ch 1, turn, skip (sk) first st, sc in next 3 sts, *3 sc in next st, sc in next 3 sts, sk next 2 sts, sc in next 3 sts; rep from * to last 5 sts, 3 sc in next st, sc in next 2 sts, sk next st, sc in last st.


Then I did 6 rows of white and two of the colours.
----------------------------

Happy crocheting!

Saturday, 4 February 2012

Felt aeroplane mobile

My newest mobile is this little felt bi-plane.
DH told me that the plane's propeller looks like a moustache and now I can't help seeing it that way! Weirdly I am then reminded of the Red Baron that Snoopy dog fights then :)

This little plane fits in my hand and is so light because of the felt and fibrefill that it spins merrily in the wind.
It is currently snowing outside so I'm not really opening windows to feel the arctic breeze but I did spend a couple happy minutes blowing this bi-plane around just to watch it dip and whirl.
Happy crafting!

Thursday, 6 October 2011

Two on the way!

It's so lovely when good friends announce they're expecting not just one little bundle but twins! The parents don't want to know the sex of these happy additions so for now we all know them as Topsy and Turvey. We're driving for 3 hours to see the couple before the arrival of these piglets and I simply had to take something in anticipation.
Firstly, the husband is a member of the Labour party like mine, and the two boys like nothing more than discussing the state of the world over a couple of beers. As a tribute to his leanings I had these printed by a lovely seller I found on Ebay.
Hammer and Sickle baby onesies! Awesome not so? And the quality of the onesies is simply great- nice, thick cotton. For the second set I shamelessly stole an idea from a Pinterest post and appliqued "copy" and "paste" on two more onesies.
I shan't show you my appalling aplique skills, it looks pretty decent from this distance but these are unfortunatley not such nice quality (oh, ebay, you hit-and-miss mistress!) so the stitches look a bit pulled because of the low thread count. sigh. It's the idea behind the gift right?

On a completely different note, I made my first apron for a friends birthday.

Just a simple pattern but without any fussy gathering. I already had the grey binding left over from my quilt, Score!
The sweet fabric is called Cartooon Dogs from the Boys Will Be Boys range designed by David Walker for Free Spirit.
I added a little button flower detail.
I have a tiny bit of this fabric left over but now I heart it so much that I can't bring myself to use it! I think I'm destined to have a hoard of material that I love too much to use! Am I the only one with this shameful secret?

Tuesday, 27 July 2010

Every Boy is a Super Hero


Whipped this up (love using this phrase- makes it seem so effortless and amazing instead of the heartache sweat and tears that actually accompany a creative endeavor!) for my Godson. He seems to be really into super heroes and space this week. And since his last birthday kinda snuck up on us and we shamefully gave him money in a card this year I am totally justified in making another present, albeit months late.

Whilst this doesn't justify a full tutorial they are so simple that with a few pointers you can be on your way!
First I started with some very cheap and simple cotton as the base, cut the shape on the fold to get it symmetrical and hemmed all around ( I actually toyed with the idea of lining it and then remembered it was for a rough and tumble boy.) Next I added the ties which were simply long strips folded like bias binding then top stitched.


I fused interfacing to the letters since I didn't feel like using a close satin stitch would be appropriate (read: it takes too long and I'm lazy). This way the logo bits won't fray and the stitching is for placement only.
Here is a closer look at that stiching from behind:

Notice how my machine had a small hiccup with the bobbin thread that resulted in some super odd zigzag. I'm sure he won't care (well, I'm hoping he won't).


I then made him a mask which was just a single layer of cotton, trimmed in red bias binging with a bit of elastic sewn to the sides. I had to use some red embroidery thread around the eyes to stop the fraying becoming too ridiculous and I suspect that I should have used felt for the entire mask instead. This would mean absolutely no seams to worry about. But it wouldn't have matched perfectly. Sigh. maybe next time I'll come up with a genius plan.
Anyway, for all my self doubt, his mum told me that he loves it and wore it to the cinema today so I count this as a success!

Wednesday, 2 June 2010

Jump right in

So I need to just start. Else the feeling of inadequacy and shame that I have been convinced to start a blog will force me to implode. Also (coincidentally) I have to stay up to 1am to fetch the husband on the milk train from London. The two are not unrelated.

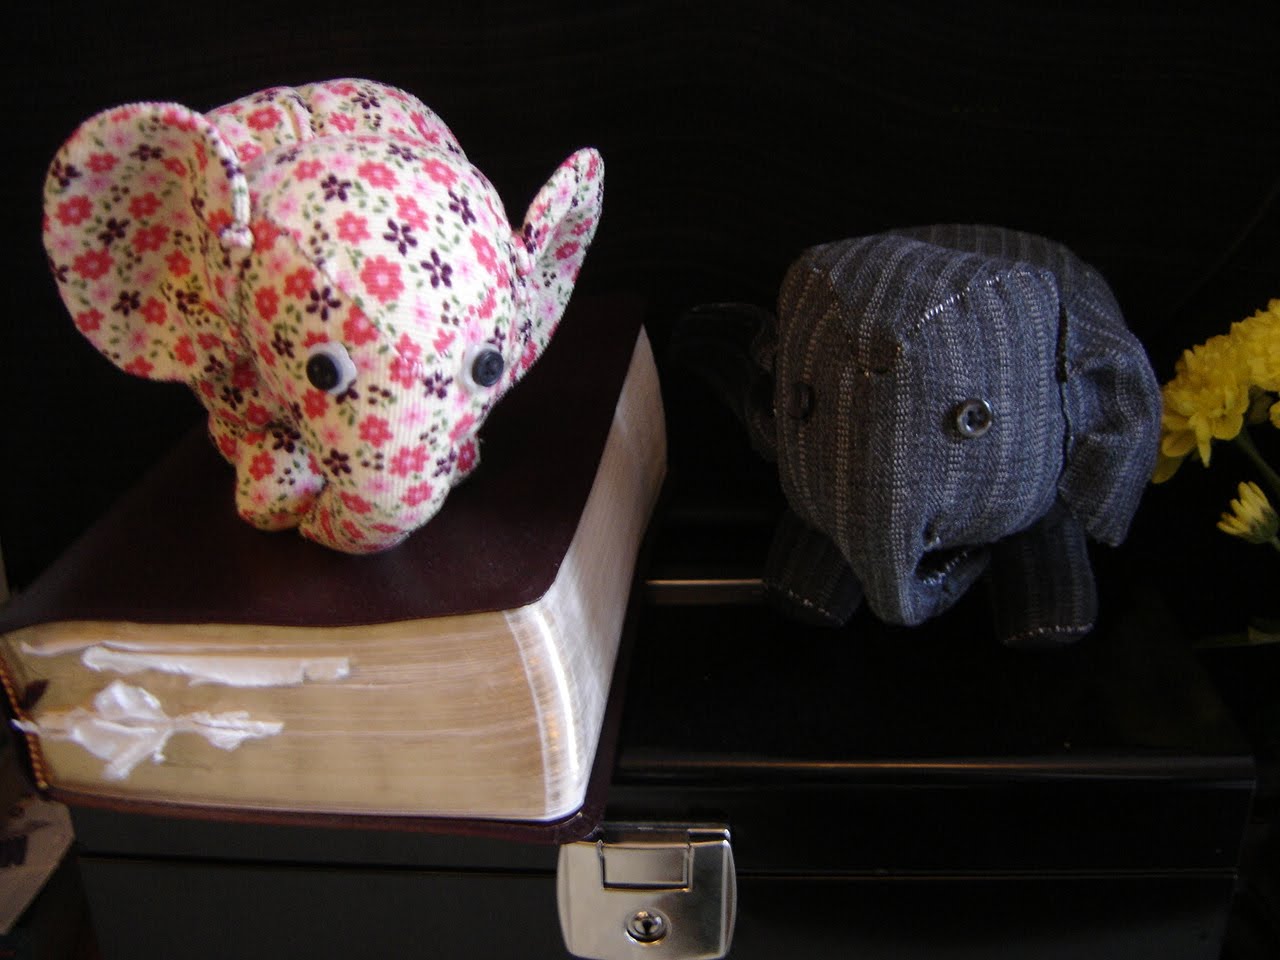
I think I shall start with some little elephants which started the current flurry of craftiness.
The grey one was thrifted from some old trousers which no longer fit (not in a good way) and was a total guess from start to finish. I couldn't be bothered to do fancy ears for him so I just singed the edges of the fabric. This was a mistake as they are scratchy and a bit yukky.
I braided some twine for their tails. The lessons learnt helped me when a 1st birthday party came up and I wanted to make a gift.
I gave the little girl the creamy beige one since it most suited her mothers tastes and was asked to make the black one by a friend. And the little pink one was requested by a lady at the birthday party. I had never met her but prefer to believe she wanted the ellie and not just to make friends with me by boosting my crafting ego :). All these little ones were hand sewn but I'm absolutely sure they could be done on a sewing machine. I always thought that animal patterns were daunting but I would seriously encourage you to just go for it! you'd be surprised how easy it is to create a creature.Also I made a simple pattern idea to show you the pieces.
Make a cylinder with a and b. cut 4 of g and 4 of f, use to make open cylinders for feet. cut 4 of e for ears. cut 1 of d and c. by sewing purple to purple, red to red etc start from forehead of elephant and work outwards. (ie red and purple bits first). When reach uncoloured seams on piece d sew trunk (light blue) sections of trunk into tube that seals closed with this tip of d. Stuff all bits and attach to each other.


If you require more detailed instructions I'd be more than willing. Leave a message below but since its waaaaay past my bedtime. goodnight for the first time :)

Make me famous!