Showing posts with label elephant. Show all posts

Thursday, 4 November 2010

Plush Baby Elephant Tutorial

I finally got round to creating the tutorial for this little guy that was requested so often. Just in time too- only 2 months crafting time left till Christmas! This elephant is perfect for kids and if making it for babies you could replace the eyes with a bit of sewn fabric or paint them on with fabric paint. 
Let's start:
 You will need some fabric- I used a cotton print of a medium weight (for home furnishings) but I have made this pattern using a much lighter, softer cotton and also corduroy. I used a piece about the size of 4x A4 notepad sheets. But the pattern can easily be scaled up or down, just make all the pieces larger or smaller together. You'll also need some stuffing  (I used fibre fill but you can use fabric scraps, old pillow stuffing etc), some coordinating thread and two buttons for eyes. A pair of scissors is necessary and I forget to picture a bit of twine or ribbon for the tail.
The link to the pattern is below, although as long as you cut the basic shapes you will be fine. Just remember to cut the long pieces that go around the circles longer than you expect (so give yourself plenty of leeway) and it'll work.Its homemade and these "quirks" are cool and make it lovelier.

These are the first pieces to cut. You will need:
  • 1x A Body (The long side of this piece needs to be able to wrap around the circumference of piece B to form a tube)
  • 2x B Body
  • 4x C Ears
  • 4x D Underside Feet
  • 4x E Sides of Legs
The piece of the left is B, it is included to show the size to cut the side of head/trunk piece. This piece is cut in the shape of a 9. It is also cut on the fold, with the long straight edge (right most edge), on the fold.
This photo shows the final piece to cut at the top. The bottom is the 9 shaped piece from above, opened up. Don't worry about making the part at the top too long. You can adjust where the back wedge shape begins later on in the process.
Finally! Let's start sewing!
The head:
Begin with the pieces we cut out in the photo earlier. With the pieces right sides facing, begin sewing as shown, by starting at the V of the forehead and working around the circular edges.
It should look like the photo below as you reach the end. Don't sew this point all the way to where the trunk starts as you want to leave a bit of a gap to stuff the head (you'll insert stuffing where a real elephants mouth would be)
When you turn the piece above over it should look like the photo below.
Starting from the forehead V again, sew the other side of the head in a similar way.
It should look like the photo below when completed.
 
 This may be a bit confusing, but this photo shows the V of the forehead of our elephant and the  trunk (tail of the 9 shape) is opened flat to the right. This may be clearer:
At this point, fold the right sides of the trunk together and sew to look like this:
Now, turn the head so the forehead is on the work surface facing away from you and sew the end of the trunk closed. In the photo below the arrow is pointing to the gap you've left to turn the head the right way round and stuff,and the dashed line is where to sew the trunk closed at the bottom. I have finger pressed open the seam we did in the step previously.
 Turn the head the right way round and stuff.
(A note about stuffing- when using fiber fill- mold the piece in you hand a bit before inserting and try to keep it all as one bit, instead of putting in individual blobs of stuffing. This helps prevent a lumpy look)
We made a head! have a cup of tea and take a well deserved break.
The body:
Start by taking 1 of the B pieces and sewing the long side of piece A around its outer edge with right sides facing. This should form a tube shape like the photo below. Don't close the side of the tube!

Similarly sew the final B part to cap the other side of the tube. Through the side of the tube you've left open, turn and stuff the body. Then, sew the opening closed by using the extra flap shown above and trimming the excess, if necessary.
You should now have this:
Pin the head to the body using pins. A note whilst making children's toys- Remember to keep track of your pins! I use large colourful ones to be very certain, but just do a good final check before handing the toy over.

Sew the head to the body. I just do a bit of a whip stitch around the "neck" part twice to make sure it is secure and doesn't wobble.

Making the feet
Make the feet using the same method as the body to sew the long side of piece E to the circle D to make a tube with an open side.
Then sew up the open side, turn right way around and stuff (not too full, leave some fabric at the top and aim to make short, dumpy legs)
Close the top of the leg up, like a parcel. This doesn't have to be too neat, just enough to hold the top together whilst you sew the leg to the underside of the body.
 To make the ears
With right sides facing, sew two of the ears together but leave a little space to turn them right way round.
Before turning snip the fabric towards your line of stitching without actually cutting you sewing! This will help the curved seams lay flat. (green lines in picture below)
Attach
Using the method for connecting the head to the body, attach the legs to the underside of the body. Then attach the ears:
A close up of ear sewing- the pink is how to stitch them on:
Sew on the eyes, making very sure, if this present is for children, that you do this securely and well.
 Lastly, using some string, twine or ribbon make your elephant a tail (ass shot!) and sew it on:
 
Well done!
 Edit: Here are the basic pattern pieces. It is over two pages. 
This is my first pattern so hopefully it works. The pages should each be printed on a standard A4 sheet (but you could scale it up, as long as you scale all the pattern pieces at once).  You should probably cut out the pattern pieces and arrange them on your own fabric, as I just tried to fit them on a page and you may have patterns that require the pattern pieces along the grain/fabric design etc. I have not included any seam allowances as I mostly hand sew these and use a tiny allowance- so add one if you like.Please leave me feedback if changes are required so I can edit it to make it a better pattern for others and I can get better at it :)!

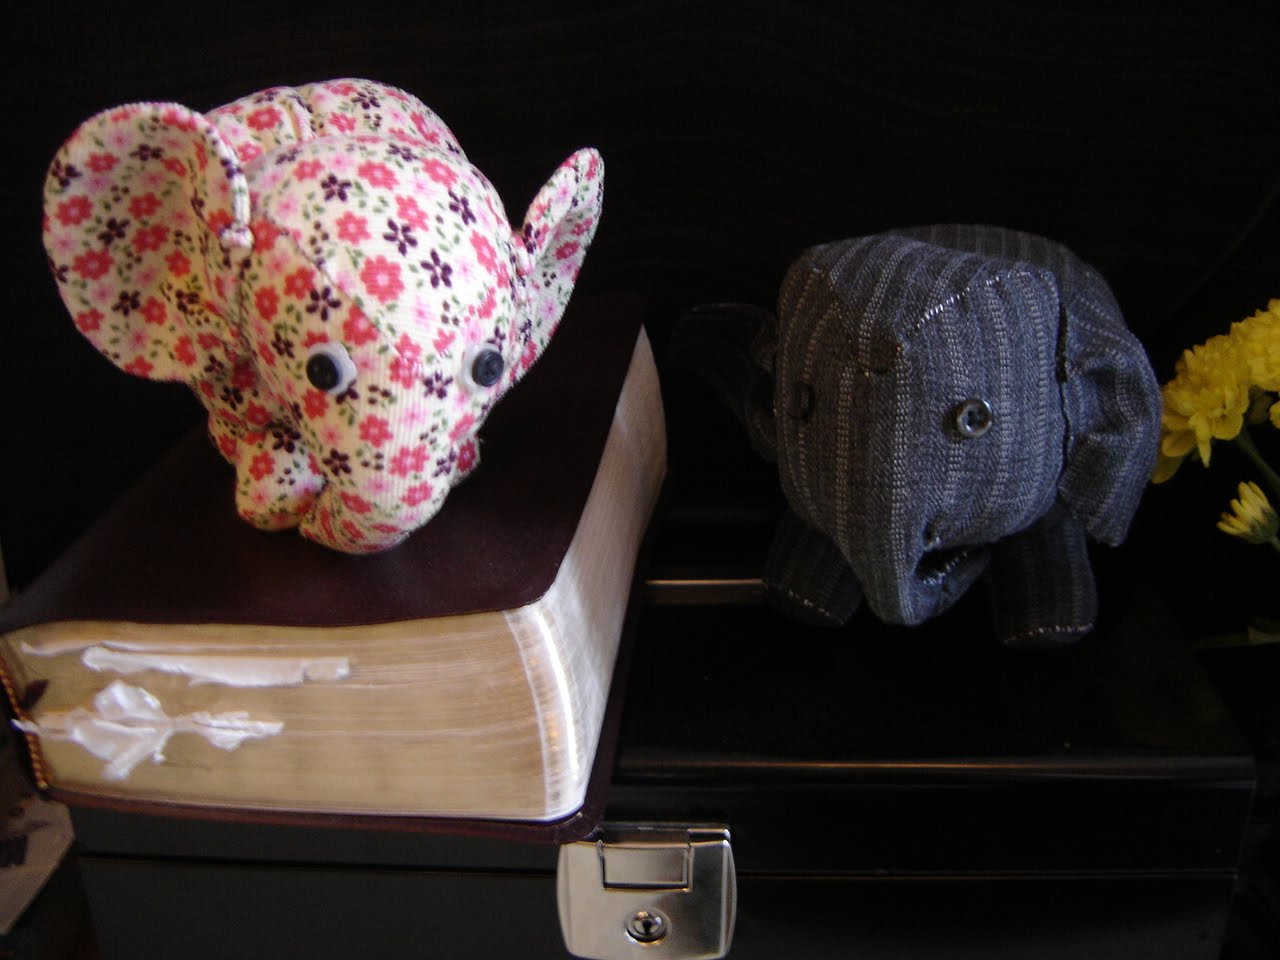
You've completed a baby stuffed elephant! Leave me a comment below if you need any additional help (or to point me and others to pictures of the ones you've made). I'll leave you with ones I've made using this pattern before, for inspiration :)

Wednesday, 2 June 2010

Jump right in

So I need to just start. Else the feeling of inadequacy and shame that I have been convinced to start a blog will force me to implode. Also (coincidentally) I have to stay up to 1am to fetch the husband on the milk train from London. The two are not unrelated.

I think I shall start with some little elephants which started the current flurry of craftiness.
The grey one was thrifted from some old trousers which no longer fit (not in a good way) and was a total guess from start to finish. I couldn't be bothered to do fancy ears for him so I just singed the edges of the fabric. This was a mistake as they are scratchy and a bit yukky.
I braided some twine for their tails. The lessons learnt helped me when a 1st birthday party came up and I wanted to make a gift.
I gave the little girl the creamy beige one since it most suited her mothers tastes and was asked to make the black one by a friend. And the little pink one was requested by a lady at the birthday party. I had never met her but prefer to believe she wanted the ellie and not just to make friends with me by boosting my crafting ego :). All these little ones were hand sewn but I'm absolutely sure they could be done on a sewing machine. I always thought that animal patterns were daunting but I would seriously encourage you to just go for it! you'd be surprised how easy it is to create a creature.Also I made a simple pattern idea to show you the pieces.
Make a cylinder with a and b. cut 4 of g and 4 of f, use to make open cylinders for feet. cut 4 of e for ears. cut 1 of d and c. by sewing purple to purple, red to red etc start from forehead of elephant and work outwards. (ie red and purple bits first). When reach uncoloured seams on piece d sew trunk (light blue) sections of trunk into tube that seals closed with this tip of d. Stuff all bits and attach to each other.


If you require more detailed instructions I'd be more than willing. Leave a message below but since its waaaaay past my bedtime. goodnight for the first time :)

Make me famous!